
In order to demonstrate to my class how to create an illustration from start to finish, I decided to work alongside them. Knowing the “Tiny Dragons” contest had just been announced, that became my parameter. Not having a clue in my head of what I was going to create, like everybody else, I sat down and generated a host of thumbnails, each one building on the previous thought, as I tried to come up with ideas.
I eventually came to a solution that involved a young, medieval child holding a baby dragon in his hands. It didn’t take long for me to make that young child the legendary Arthur himself.
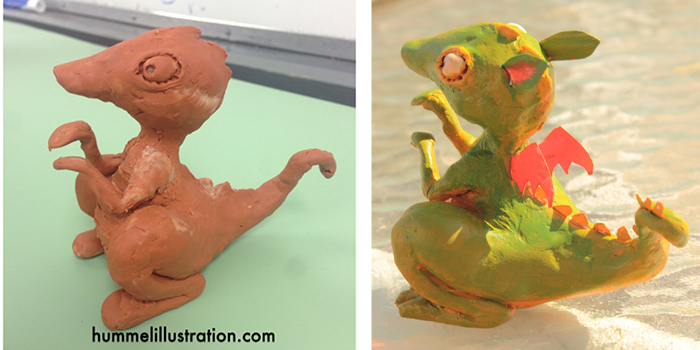
I wanted some sense of realism and I knew this wasn’t going to be achieved straight out of my head. My next step required me to create a model of the dragon, something that I could color and light, so that I could see how the character looked in three dimensions. I used sculpey, and I built this character in class, as a part of my demonstration. I often create these maquettes if I’m having difficulty imagining how something might look in space or how something might be particularly lit.
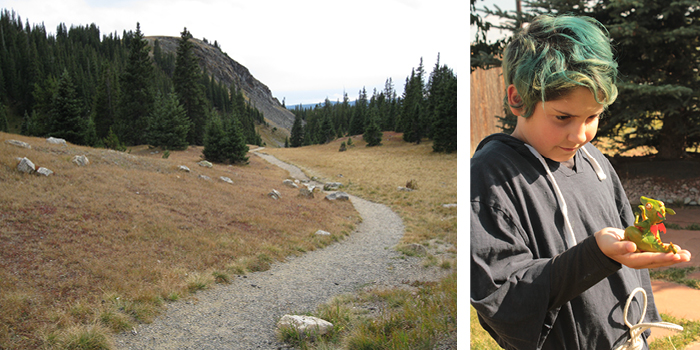
Now I had to get my King Arthur to model for me. My nephew fit the profile perfectly. Upon his visit, the first thing he enthusiastically asked is if he could wield a sword for the photographs. Well, not really for this image, but in exchange for him holding the dragon contemplatively, I did take several pictures of him in his very ninja like stances.
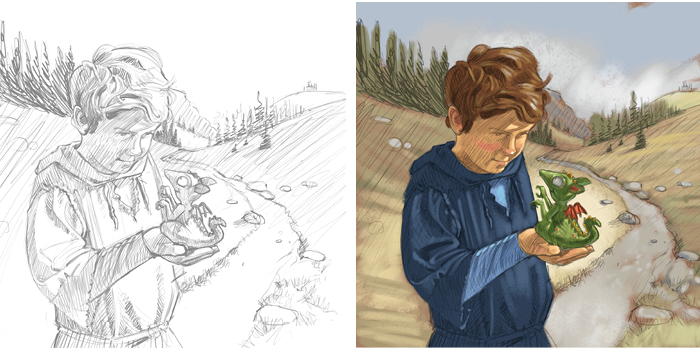
After the photos, I created a refined line sketch of the image, which I then created a few value studies in order to understand how everything was going to be lit in the scene. On top of the value studies, I tried a few different color schemes until I elected to go with the one demonstrated here.
I was able to work on the painting in class as a continuation of my demo. My first step is to create texture. I did this by taking an old nasty house brush and scraping the gesso across a piece of Masonite board. Then I stain this with a greenish brown thinned out acrylic base. Once that has been established, I find the darkest areas and I push them back. I compliment this by bringing out some of the light areas forward. I allow some of the texture to still peep through, especially in the background areas.
That’s it. That’s how I do it. If you like this image and if these step by step instructions helped, support the Tiny Dragon project on Kickstarter, or support me by purchasing one of these “Young King Arthur” art prints here.